This section outlines the different options available to you that control how your iOS game projects will be compiled. The different sections are:

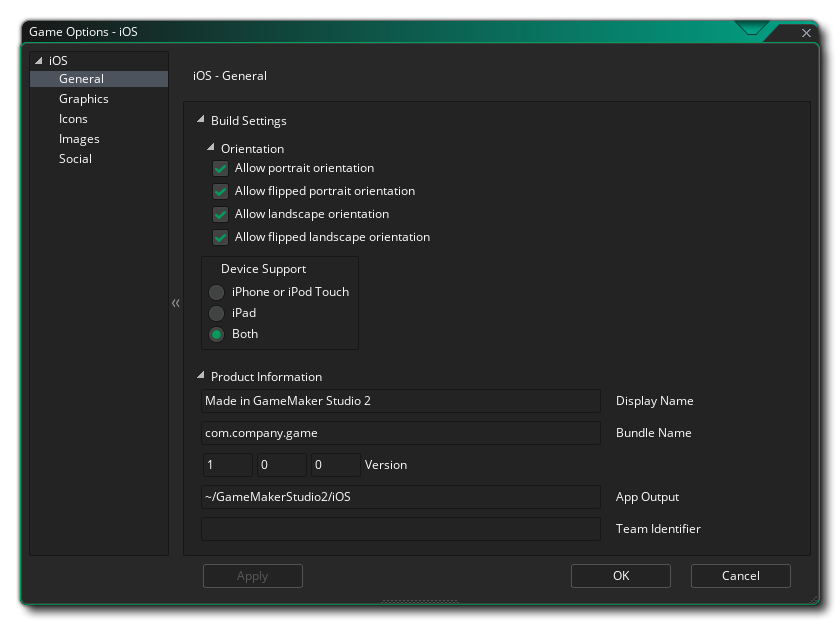
The first part of the General section covers Build Settings for your game. To start with you set the Orientations that your game can be run on for the best user experience. The available options are:
- Portrait
- Flipped Portrait
- Landscape
- Flipped Landscape
You can then go to the Device Support section, with the following options available for setting what type of device to target:
- iPhone or iPod Touch: iPhone 4 and above or iPod Touch devices
- iPad: iPad devices
- Both: Both iPhone/iPod and iPad
The second thing to do is fill in the Product Information about your game, including its Display Name, its Bundle ID and the Version info. Note that the Bundle ID must be in the correct reverse URL format for the final build of the game to work correctly, EG: com.[Company].[GameName]. Here you also need to give the Team Identifier that you wish to use for signing the final application that GameMaker Studio 2 creates for you. Setting it here will overide the Team ID that you have supplied in the iOS Preferences.

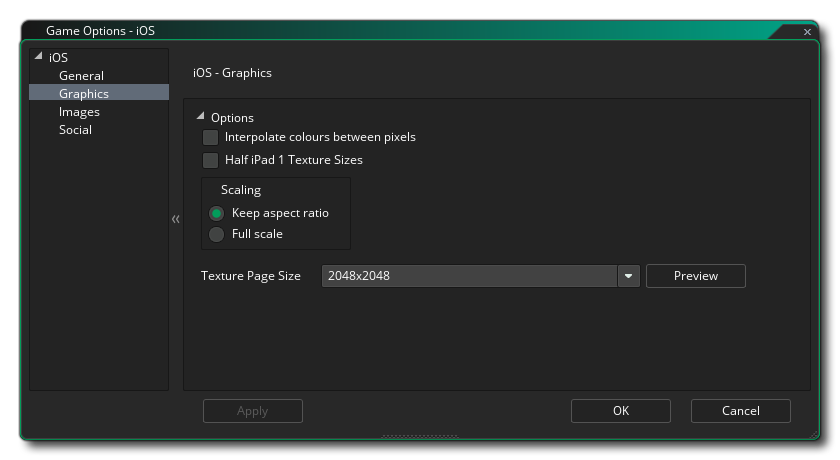
Here you can change the following details related to how your game will be displayed, with the following options available:
- Interpolate colours between pixels: Turns on interpolation, which basically "smooths" pixels. for crisp pixel graphics, it should be off, but if you have nice alpha blends and smoothed edge graphics it is better left on. Default is off.
- Half iPad 1 Textures: The iPad 1 has much less texture memory than more recent devices so you can enable this option to reduce the size of textures by half if you want to target this device or get maximum compatibility.
- Scaling: Here you can select to scale the draw canvas maintaining the aspect ratio within the device screen - adding "padding" around the edges to fit the screen - or you can select to have the draw canvas stretched stretch to fit.
Finally there is the option to set the size of the Texture Page. The default (and most compatible) size is 2048x2048, but you can choose from anywhere between 256x256 up to 4096x4096. There is also a button marked Preview which will generate the texture pages for this platform and then open a window so that you can see how they look. This can be very useful if you wish to see how the texture pages are structured and to prevent having texture pages larger (or smaller) than necessary.
NOTE: Be aware that the larger the size of the texture page, the less compatible your game will be.

This section permits you to add the various different icons required by the various devices and the different parts of the iOS App Store. These icons should be authored as 24bit .png images at the size specified for each one.
It is worth noting that GameMaker Studio 2 has a Project Image Generator tool which can be used to automatically create all the Icons required for all the different target platforms your game is being compiled to. If you use this tool, you should revise the images created to ensure that they are what you require.
NOTE: On importing an older project you may be presented with the following warning:This comes up because the current iOS target version has changed the format of the required icons since the project was previously loaded. You will be required to re-create all the icons, as they will have been replaced with the generic GameMaker Studio 2 icons (you can use the above mentioned Project Image Generator tool to do this quickly).

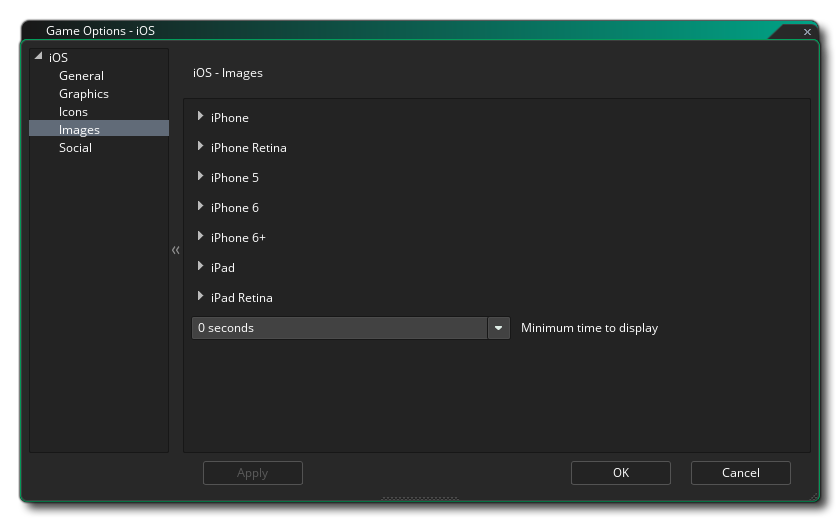
This section permits you to add separate graphics as splash screens (the image that will be shown briefly while your app loads) for each of the different iOS target devices. These images must be authored as individual 24bit *.png images with no transparencies and at the correct size for each of the devices and orientations required. You can also set a minimum time for showing the splash screens from the drop down menu at the bottom (from 0 to 10 seconds).
It is worth noting that GameMaker Studio 2 has a Project Image Generator tool which can be used to automatically create all the images required for all the different target platforms your game is being compiled to. If you use this tool, you should revise the images created to ensure that they are what you require.

This section is for enabling different Social features in your Android game. The following options can be chosen:
- Facebook: If you require the Facebook functions, you need to select this checkbox and then supply the Facebook App ID and Facebook App Name. Note that all Facebook functionality is accessed via an extension, and when you first check the Use Facebook box you will be prompted to download and install the Facebook extension from the Marketplace.
- Enable Push Notifications: In order for your game to use Push Notifications they must be enabled here first otherwise they will not work.